
About
dendroid offers large variety of applications, from small web presentations up to large software solutions. Facebook Comments


Contact Us
If you have any questions or requests, contact us using this online form and we will get back to you as soon as possible. Facebook Comments
Most Recent Articles:

Insta Feed Widget - Wordpress
What is Insta Feed Widget?
It is simple yet powerful Wordpress widget that can display your (or any other) Instagram feed. Everything is done with one widget, no seprate sections glued together. You can define what attributes are displayed like username, bio or number of followers. You can have all of it displayed like this: or just select the lines you want:
 Set how many images are shown and how many columns you want. Alter it for sidebar and display several lines of small ones:
 Hover shows you description, likes and comments, and takes you to Instagram page to add yours:
 Displaying any other public feed than yours is also possible, but you will need to obtain that profile's "instagram user id" using widget Settings. In WordPress admin, navigate to Settings > Insta Feed Widget and using "Lookup User ID" section, find the profile you are looking for and use the user ID in Customizer when setting up your widget.
 In order to use this widget, you will first have to authorize it with Instagram in WordPress admin, navigating to Settings > Insta Feed Widget and clicking Authorize button.
Try It
To try the widget yourself, download it via Wordpress plugin manager or directly from plugin site. Let me know what you think of it.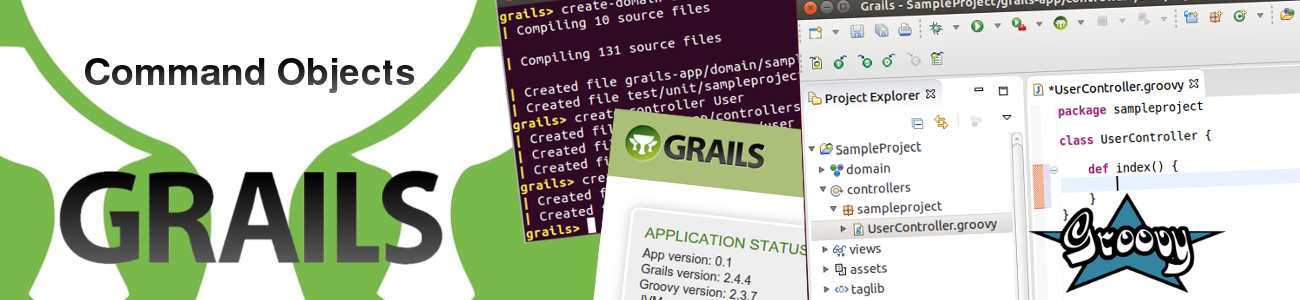
Start using Command Objects in Grails
Using Grails forces you to implement MVC architecture (Grails uses Spring MVC internally). Which is nice. Convention says, views communicate with controllers, which then uses services to alter models.This set-up is quite straightforward for simple applications, but having complex business logic with huge user input can make this a mess. That, and much more can be solved using Command Objects.
Controller without Command Objects
Let's illustrate on a controller from my previous post Grails - Groovy On Rails first project.
class UserController {
  def userService

  def add() {
    def user = userService.add(params.firstName, params.lastName)
    user ? render (text: "OK") : render (status: 400)
  }
}
This is simple user addition. No validations, no logic used. Let's add some to it so we can work with it.
class UserController {
  def userService

  def add() {
    def gender
    if (!params.firstName || params.firstName.size() < 3 ||
        !params.lastName || params.lastName.size() < 3) {
      render (text: "name should be at least 3 characters long", status 400)
      return
    }
    if (!params.gender || !params.gender in ["M", "F"]) {
      render (text: "gender should be M/F", status 400)
      return
    } else {
      gender = params.gender == "M" ? "male" : "female"
    }
    if (userService.findByFirstAndLastName(params.firstName, params.lastName)) {
      render (text: "user already exists", status 400)
      return
    }

    def user = userService.add(params.firstName, params.lastName, gender)
    user ? render (text: "OK") : render (status: 400)
  }
}
Adding input validations to the method does not make it more readable. Input is not our domain, so we can not validate it directly there. Also in case you need to transform inputs into other objects (in this case M/F into male/female) someplace outside the controller, you will probably end up with utility class or service. That is not a way to go. Rather than filling controllers with validations and transformations, there is a elegant way to do so.
Adding Command Object
It's something between domain and service, served as layer between view and controller. Most important thing is, that it will clean the controller. Command object will automatically bind the input, whether it is url encoded param or post body as json or xml. For now, it is not possible to bind url attributes along the body object, but there is a official bug issued for quite some time, so i hope it will be taken care of eventually.
You can add constraints to it like you are used to with domains and also you can add util methods that are directly relevant to the input. Also bean injection works, so you can use services within. It is a pretty neat tool to make the code more clear and readable. You can read a bit more on grails wiki.
This is simple implementation for our previous example:
class UserCommand {
  String firstName
  String lastName
  String gender

  def userService

  def getGenderString() {
    gender.toUpperCase() == "M" ? "male" : "female"
  }

  static constraints = {
    firstName(minSize: 3, blank: false)
    lastName(validator: { value, obj ->
      if (!value || value.length() < 3) {
        return "invalid.last.name"
          //this can be key from messages.properties
      }
      if (userService.findByFirstAndLastName(firstName, lastName))
        return "user.already.exists"
    })
    gender(matches: /^[MFmf]{1}$/)
  }
}
class UserController {
  def userService

  def add(userCommand) {
    if (userCommand.validate()) {
      def user = userService.add(userCommand.firstName, userCommand.lastName, userCommand.genderString)
      user ? render (text: "OK") : render (status: 400)
    } else {
      render (status: 400, text: userCommand.errors)
    }
  }
}
And if we want ot get rid of userService from controller alltogether, move "add" execution directly there as follows:
class UserController {
  def add(userCommand) {
    if (userCommand.validate()) {
      userCommand.addUser() ? render (text: "OK") : render (status: 400)
    } else {
      render (status: 400, text: userCommand.errors)
    }
  }
}
class UserCommand {
  ...
  def addUser() {
    userService.add(firstName, lastName, genderString)
  }
}
That will add much clarity to your code as now, input is firstly taken care of in command object, then as an object it is used in controller, where you can focus on more important stuff than validation. Also constraints are the same as used in domains, which work fantastic. You can use predefined keywords or model whole validator yourself with message outputs (which may or may not be included in message.properties if you don't need text output). Anyway, more on constraints can be found on grails wiki.
Start using command objects now!

Grails - Groovy On Rails first project
 It is an awesome framework. I have worked on several small and big Grails projects, and the same patterns (problems/ surprises/ benefits) appeared on each of them.
When NOT to use Grails:
It is an awesome framework. I have worked on several small and big Grails projects, and the same patterns (problems/ surprises/ benefits) appeared on each of them.
When NOT to use Grails:
- You don't know yet how your project will scale up Adding simple controllers or services is fine, but tripling the whole codebase and adding numerous data sources and different output types and services can be frustrating using a language that's motto is "Convention over Configuration". More and more complicated project will get, more conventions you need to (or want to) break, which comes up with many work-arounds -> thus problems.
- Your project will keep changing a lot - and you already know it Refactoring is a pain if you use all that language offers. Writing dynamic variables do not hold references, so can hardly be refactored automatically. You will remember it next time you get IllegalArgumentException or NullPointerException or ...
- You need your first demo/ POC by the end of the day. It is incredible how much you can do with Grails in first stages of the project. You can build whole application in matter of minutes and have working RESTful services including admin view and database in matter if hours. Of course at some point, it gets slower than you would expect, but you met that deadline for first version, so you have that going for you, which is nice.
- You want simple hassle free project Grails contains many features that simplify your work. No need for getters and setters/ constructors/ extensive class configurations and many more features that will minimize your code just by using conventions. You can enjoy Spring-powered dependency injection with even simplified config compared to Java. No need for separate development server, because Grails contains it's own integrated web server for development with continuous deployment...
Create your first Grails project
After downloading and installing the framework (from official sie or preferably via SdkMan to manage your versions easily), go to your workspace and just typegrails create-app SampleProjectand your first empty project is ready. Now navigate into project and start-up Grails console
cd SampleProject
grails
and create domain, service for that domain and also a controller for it
create-domain-class User
create-controller User
create-service User
Now go to your favorite IDE (there is dedicated eclipse based ToolSuite available) and import newly created project.
Connect Database to your project
Let's create new database for our project, let's name it "sample", with mysql.mysql> create database sample
connect database in conf/DataSource.groovy like this:
environments {
  development {
    dataSource {
      dbCreate = "update" // one of 'create', 'create-drop', 'update', 'validate', ''
      url = "jdbc:mysql://localhost/sample"
      dialect = "org.hibernate.dialect.MySQL5InnoDBDialect"
      driverClassName = "com.mysql.jdbc.Driver"
      username = "root"
      password = ""
    }
  }
...
}
and in conf/BuildConfig.groovy under dependencies uncomment (or add if it is not there)
runtime 'mysql:mysql-connector-java:5.1.29'
and that is it.
Add some simple RESTful service
add new attributes to User domain. Id or version is not needed as that will be used as default for every domain class.String firstName String lastNameedit UserService.groovy to add 2 new methods. Storing and retrieving user from DB.
def add(firstName, lastName) { //no restrictions here on data types
  def user = new User(firstName: firstName, lastName: lastName)
    //this constructor does not need to be defined in User domain
  user.save()
    //this is also return statement, so saved user will be returned
}
def find(name) {
  User.findAllByFirstNameLikeOrLastNameLike(name, name)
    //GORM will create query out of this, returning the list of Users
}
and update UserController to look like this:
class UserController {

  def userService //this will automatically inject UserService

  def add() {
    def user = userService.add(params.firstName, params.lastName)
      //calling our service
    user ? render (text: "OK") : render (status: 400)
      //if user is returned, render HTTP status 200 and text "OK" otherwise just return status 400
  }

  def show() {
    def users = userService.find(params.query)
    if (users?.size() > 0) {
      render users as JSON
        //grails.converters.JSON will convert object into JSON format.
        //you can also use XML or define own marshaller
    } else {
      render status: 400
    }
  }
}
This is enough to have functional RESTful API. We will now start the application by
grails run-appNo tomcat server installation and configuration is required here. It should just end up with something like
|Server running. Browse to http://localhost:8080/SampleProjectBy going to that link, you will see Welcome Page like this:
 Because we did not specify what kind of request we need to make for any of our calls, lets just paste this into browser to add new user:
http://localhost:8080/SampleProject/User/add?firstName=first&lastName=lasturl consists of {your app url}/{name of the controller without the keyword "Controller"}/{name of the method} and because we were using "params" in our methods, inpout should be url encoded In order to search for our newly created user, type:
http://localhost:8080/SampleProject/User/show?query=lastto retrieve the user JSON:
[
    {
        "class": "sampleproject.User",
        "id": 1,
        "firstName": "first",
        "lastName": "last"
    }
]
And that is it! Simple in few steps. really easy to quickly prototype applications.